
Bathroom remodeling is difficult, time-consuming, and perhaps unpleasant, but it is also satisfying after it is finished. In my earlier writings, I described how to:
Create a bathroom
Calculate tile size
Take down a bathroom
Put in a bathtub, a toilet, etc.
Create a layout
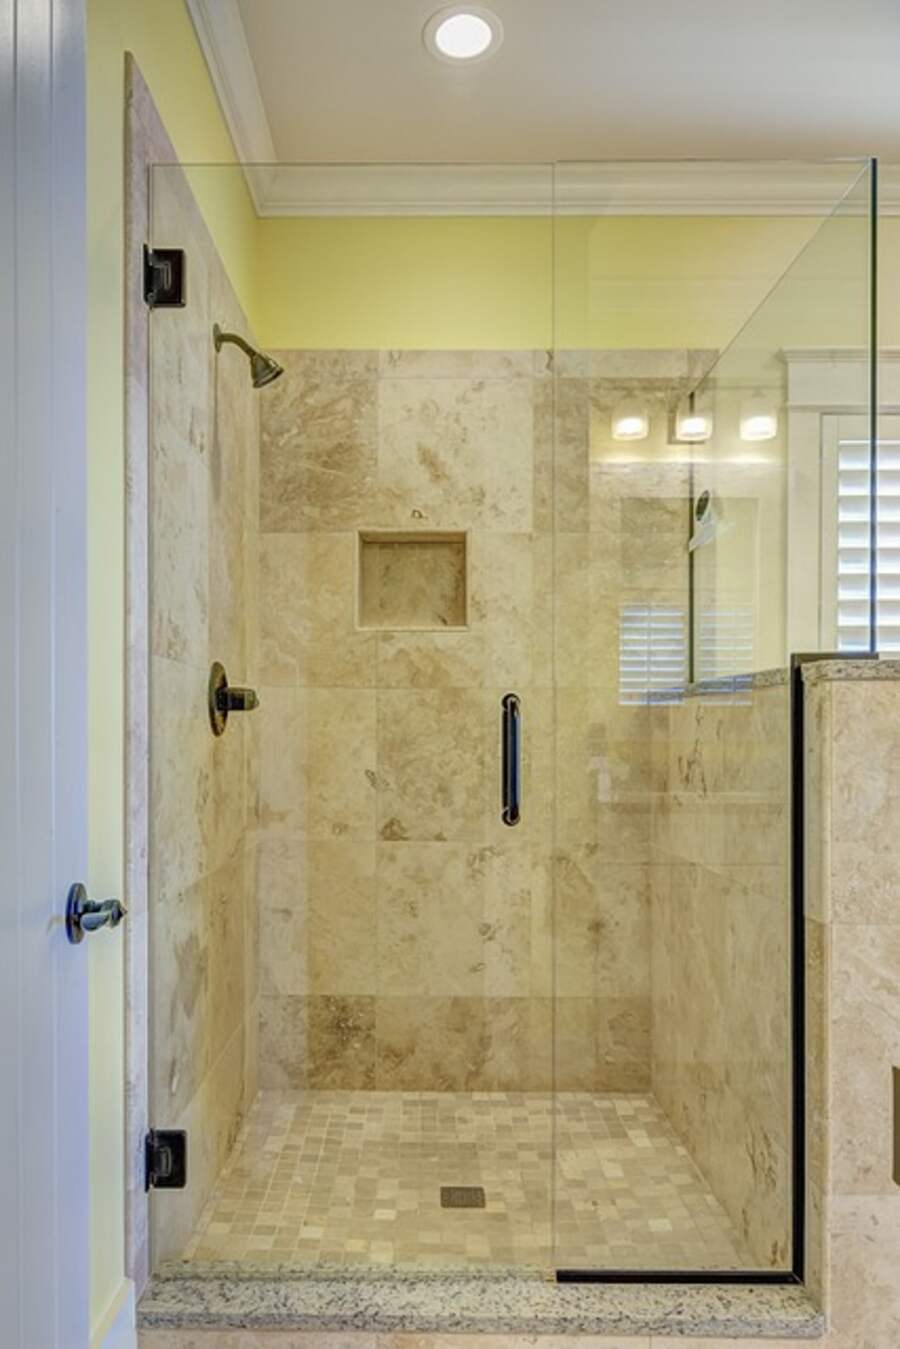
A temporary ledger board must first be installed to install the tile correctly. Measure the width of the bottom tile plus two grout lines up from the tub deck to determine where to place the ledger board.
Using a prior article’s example, the ledger board should be positioned 8 5/16 inches away from the tub deck.
Tile size
8 1/16 in.
grout line separating the lower tile from the tub deck
1/8 of an inch grout line separating the bottom tile from the following row of tiles
1/8 of an inch
Total
Inches: 8 1/16 + 1/8 + 1/8 = 8 5/16
It’s time to install your ledger board and place the shower tile.
A quick-setting mortar is required for installing wall tile in a shower. Thanks to quick-set mortar, the tile will adhere to the wall better and won’t sag. Apply thin-set sanded mortar while working with cement. When applying to vinyl or wood surfaces, use a thin set mortar treated with latex. Never use mastic to install the shower! The moisture from the rain will cause mastic to deteriorate over time.
You will also need a water source, a 5-gallon bucket, a drill, and a mixing bit to mix the mud base. Because it will dry out rapidly, mix the mortar in small batches as the manufacturer directs. Plan on making multiple batches of mortar if you’re preparing it in tiny amounts to complete setting the shower tile. Instead of installing a row of tiles, waiting 24 hours for the mortar to cure, installing another row of tiles, waiting another 24 hours, and so on, as you would with ordinary thin-set mortar, quick rigid mortar eliminates this step.
I advise you to remove several cartons of the shower tile you are using. To help you eliminate color variances in the tile from box to box as you set it, utilize tiles from various packages.
When installing tile, be prepared to make cuts. For assistance with these cuts, you can hire a ceramic tile saw. Installing the entire tile pieces first is advised if you are laying the tile yourself. An excellent moment to measure and cut the necessary tile pieces is when you need to make more mortar. This way, as you measure and cut each tile individually, you won’t have to worry about the thin set drying out.
Spread the mortar mixture on the tile to begin setting it. Spread the mortar on the tile using a square-notched trowel with an inch-to-inch spacing of 1/4 to 3/8. Use a scoop that is the right size according to the manufacturer’s specifications and follow the mortar’s manufacturer’s instructions.
Onto the wall, press the tile. To ensure that each tile makes good contact with the glue, firmly press each tile into position and give it a tiny twist. To assist in keeping your grout lines consistent with the other tiles already in place as you work around the shower wall, install tile spacers on each tile’s four edges. Do not slide the tile more than 12 inches to set it in position. Remove the first few pieces of tile to confirm that the thin set has been applied uniformly over the tile.
Maintain a distance from the tile’s edge when spreading the thin-set. Remove any thin set that smears over the tile’s surface by wiping it off. Ensure that the initial tile is positioned square to the markings. The remaining tiles will be incorrect if the initial tile is incorrect. You might need to tap on the tile with a rubber mallet to get the tile flat with the others. Make sure to check the tile to ensure it hasn’t moved periodically. Inspect the tile surrounding the shower from a distance to check for any flaws.
Repeat this procedure until every field tile has been set, working your way up and down the wall. As you progress around the wall, check each tile twice to ensure that it has not shifted and that the grout lines are uniform. Give the tile 24 hours to dry. Install the final field tile after removing the ledger board. At this time, you also lay the trim tile.
It’s time to grout the tile that has been installed after it has been set and given time to dry. It is a good idea to tile the entire bathroom and grout the entire bathroom at the same time if you are also laying tile on the bathroom floor.
Setting floor tile will be covered in the following article. We shall discuss grouting the installed tiles after the floor tiles have dried.
Excel Builders concentrates on custom remodels, including, but not limited to, bathroom, kitchen, house expansions, and home upgrades.
Excellent customer service is the cornerstone of Excel Builders’ success! The majority of contractors can finish construction and remodeling jobs by building codes. The ability to complete renovation and construction projects while paying close attention to detail and offering top-notch customer service, however, is a skill that not all contractors possess.
As if they were our own personal remodeling projects, we take the utmost care with those of our customers. To create the makeover that best suits you and your demands, we first listen to your needs and desires for the project. To ensure the success of your remodeling project, we all work as a team.
We know that the client will be gushing about the worth and quality of their dream home or restoration long after our carpenters and craftsmen have finished it, which means they will mention us!
See why we are the most excellent remodeling contractor in Minneapolis and the surrounding areas by reviewing our prior work.
Contractor for the bathroom remodeling.
Read also: https://elearningzonee.com/technology/